Understanding Django Views: The Heart of Django Development
Complete Guide to Django Views: Mastering FBV, CBV, and Generic Views
Full-Stack Developer | React & Django Enthusiast | DSA Enthusiast Passionate about building scalable web apps with modern tech. Currently exploring Django for backend magic and crafting sleek UIs with React. Writing about what I learn to help others on the same journey.
When it comes to Django, views are the heart of development—this is where your application’s core logic and business rules live. In this blog, we’ll take a deep dive into Django views, exploring the differences between Function-Based Views (FBVs) and Class-Based Views (CBVs), and also unlocking the power of Django’s Generic Views like ListView, CreateView, UpdateView, DetailView, and DeleteView.
Whether you're a beginner just starting out or an experienced developer, there’s something valuable here for you. From understanding the fundamentals to picking up subtle best practices, this blog aims to level up your Django skills in a structured and practical way.
Introduction to Django Views
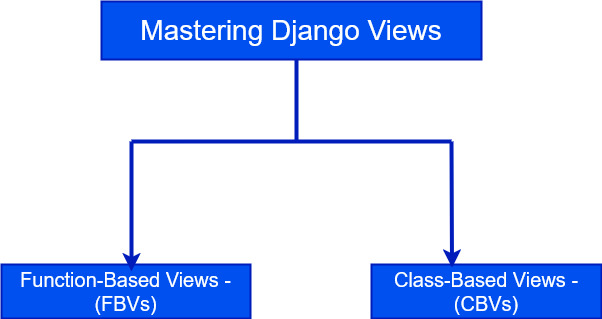
When working with Django, views are where your application’s core logic is implemented. There are two primary ways to handle requests in Django: Function-Based Views (FBVs) and Class-Based Views (CBVs). Let's break down what each of them means and how they differ.
Function-Based Views (FBVs)
A Function-Based View is simply a Python function that takes an HTTP request as input and returns a response. This response can be a rendered HTML template, a HttpResponse, a JSON response, or even an error page.
FBVs typically use conditional statements to handle different HTTP methods (like GET, POST, PUT, PATCH, DELETE).
from django.http import HttpResponse

def test(request):
    if request.method == "POST":
        return HttpResponse("This is Post method")
    elif request.method == "GET":
        return HttpResponse("This is get method call")
Class-Based Views (CBVs)
A Class-Based View is a Python class that inherits from Django’s built-in View class or one of the generic views. Instead of using conditional statements inside a single function, CBVs provide separate methods like get(), post(), put(), patch(), and delete() to handle each HTTP method individually.
from django.views import View
from django.http import HttpResponse

class TestView(View):
    def get(self, request):
        return HttpResponse("This is get method call")
    def post(self, request):
        return HttpResponse("This is post method call")
Types of Class-Based Views in Django
Django provides two main types of Class-Based Views (CBVs): Base Views and Generic Views*.*
Base Views
Base Views are foundational classes like
ViewandTemplateView. These views give you complete control over handling requests and crafting responses. They're ideal when you want to fully understand or customize the request-response flow.Using Base Views, you manually define methods like
get(),post(), etc., giving you a clear picture of how your view behaves for different HTTP methods.Generic View
Generic Views are powerful, pre-built views provided by Django to simplify common tasks like displaying lists, creating new objects, updating, or deleting them.
ListViewCreateViewUpdateViewDetailViewDeleteView
⚠️ Note: FBVs vs. CBVs
It’s important to understand that Class-Based Views do not replace Function-Based Views, and vice versa. Each has its own pros and cons. The choice depends on the complexity of the logic, reusability, and personal or team preference. As smart Django developer you should knows where and when to use each.
🛠 Setting Up the Blog Model (for CRUD Operations)
from django.db import models

class Blog(models.Model):
    title = models.CharField(max_length=200)
    content = models.TextField()
    author = models.CharField(max_length=100)
    created_at = models.DateTimeField(auto_now_add=True)
    updated_at = models.DateTimeField(auto_now=True)

    def __str__(self):
        return self.title
     #  __str__ method is added for better readability when viewing objects in the Django admin or shell
📖 CRUD with Function-Based Views (FBVs)
Let’s start with the READ operation using Function-Based Views. This example demonstrates how to retrieve all blog entries from the database and pass them to a template for rendering.
✅ Read (GET) – Display All Blogs
from django.http import JsonResponse
from .models import Blog
from django.shortcuts import render, redirect
from django.urls import reverse
from django.http import HttpResponse

def all_blogs(request):
    blogs = Blog.objects.all()
    print("This is a function-based view")
    context = {'blogs': blogs}
    return render(request, 'blogs.html', context)

# you can also used json response to retrieve data in browser
def all_blogs_json(request):
    blogs = Blog.objects.all()
    data = [
        {
            'id': blog.id,
            'title': blog.title,
            'content': blog.content,
            'author': blog.author,
            'created_at': blog.created_at,
            'updated_at': blog.updated_at,
        }
        for blog in blogs
    ]
    # safe=False for Non-Dictionary Data.
    return JsonResponse(data, safe=False)
🤔 Why Do We Need safe=False in JsonResponse?
By default, JsonResponse expects the data passed to it to be a dictionary. If we want to return a list or another data structure like Python Lists, we need to set the safe parameter to False.
🛡️ In simple terms:
safe=Falsetells Django:
“Yes, I know I’m returning a list instead of a dictionary—and I’m doing it intentionally. It’s safe to send this response.”
🔗 URL Patterns for Function-Based Blog Views
from django.urls import path
from .views import *

urlpatterns = [
    # List all blogs (Read)
    path('', all_blogs, name="blogs"),
    # Create a new blog
    path('create-blog/', create_blog, name="create_blog"),
    # Update an existing blog
    path('update-blog/<int:id>/', update_blog, name="update_blog"),
    # Delete a blog
    path('delete/<int:id>/', delete_blog, name="delete"),
    # View blog details
    path('details/<int:id>/', details_page, name="details"),
]
🖥 Rendering Blogs in the Template
Once the blog data is passed to the template through the context, we can loop through it and display each blog post on the UI. Below is the core snippet used to render the blog list using Tailwind CSS for styling.
<!-- blogs.html -->
<div class="bg-white shadow-lg rounded-lg p-6 mb-8">
            {% for x in blogs %}
            <div class="mb-6 bg-white p-4 rounded shadow">
                <h1 class="text-2xl font-semibold text-gray-900">{{ x.title }}</h1>
                <p class="text-gray-700 mt-2">{{ x.content }}</p>
                <p class="text-gray-500 mt-2">Author: <span class="font-medium">{{ x.author }}</span></p>
            </div>
            {% endfor %}
    <!-- I have used tailwind css for styling purpose -->
 </div>
✍️ Create (POST) – Add a New Blog
To create a new blog post, I designed a form that accepts the following fields: title, content, and author. The fields created_at and updated_at are automatically handled by Django, so no need to include them in the form.
<div class="max-w-lg mx-auto mt-10 p-6 bg-white shadow-lg rounded-lg">
    <h1 class="text-3xl font-semibold text-center text-gray-900 mb-6">Create a New Blog</h1>
<!-- I have use only main code -->
    <!-- Form -->
    <form method="POST">
        {% csrf_token %}
        <!-- Withour csrf token error will shown after submitting the form -->

        <!-- Title -->
        <div class="mb-4">
            <label for="title" class="block text-lg font-medium text-gray-700 mb-2">Title</label>
            <input type="text" name="title" id="title" class="w-full p-3 border border-gray-300 rounded-lg focus:outline-none focus:ring-2 focus:ring-blue-500" required>
        </div>
        <!-- Content -->
        <div class="mb-4">
            <label for="content" class="block text-lg font-medium text-gray-700 mb-2">Content</label>
            <textarea name="content" id="content" rows="4" class="w-full p-3 border border-gray-300 rounded-lg focus:outline-none focus:ring-2 focus:ring-blue-500" required></textarea>
        </div>
        <!-- Author -->
        <div class="mb-4">
            <label for="author" class="block text-lg font-medium text-gray-700 mb-2">Author</label>
            <input type="text" name="author" id="author" class="w-full p-3 border border-gray-300 rounded-lg focus:outline-none focus:ring-2 focus:ring-blue-500" required>
        </div>
        <!-- Submit Button -->
        <div class="flex justify-center">
            <button type="submit" class="px-6 py-3 bg-blue-600 text-white rounded-lg shadow-md hover:bg-blue-700 transition duration-300 focus:outline-none focus:ring-4 focus:ring-blue-500">
                Submit
            </button>
        </div>
    </form>
</div>
🛡 Why is CSRF Token Required in Django Forms?
CSRF stands for Cross-Site Request Forgery—a type of attack where a malicious website tricks your browser into making an unwanted request to another site where you're already authenticated.
🧰 How Django Protects You
Django includes a built-in CSRF middleware that helps prevent this. It does so by:
Generating a unique CSRF token for every user session.
Requiring this token to be included in every POST form request.
Verifying the token on the server to make sure the request came from a trusted source (your own form).
  MIDDLEWARE = [
      # other middlewares
      'django.middleware.csrf.CsrfViewMiddleware',
      # other middlewares
  ]
🛠 Function-Based View to Create a Blog
To add a new blog post, we use a function-based view that handles both GET (to show the form) and POST (to save the form data).
Here's how it works:
We use
request.POST.get('field_name')to retrieve values entered in the form.Then, we use
Blog.objects.create()to save the new blog to the database.Alternatively, you can also use
Blog()and callsave()afterward — both approaches work!
def create_blog(request):
    if request.method == "POST":
        # Extracting form data from POST request
        title = request.POST.get('title')
        content = request.POST.get('content')
        author = request.POST.get('author')

        try:
            # Creating a new Blog entry in the database
            Blog.objects.create(title=title, content=content, author=author)

            # Redirect to blog list page using reverse
            return redirect(reverse('blogs'))
            # this is works same as
            # return redirect('/')

        except Exception as e:
            # Handling unexpected errors
            return HttpResponse(f"Error while creating blog: {e}")
    # For GET request, render the form template
    return render(request, 'create.html')
🔄 Update (UPDATE) – Modify an Existing Blog Post
To update a blog, the first step is to fetch the blog post using its unique identifier — either the id or the primary key (pk). Once we retrieve the blog, we populate an update form with the existing data using Django's context.
🧾 Template Code (update.html)
<div class="max-w-lg mx-auto mt-10 p-6 bg-white shadow-lg rounded-lg">
    <h1 class="text-3xl font-semibold text-center text-gray-900 mb-6">Update Blog</h1>

    <form method="POST">
        {% csrf_token %}

        <!-- Title -->
        <div class="mb-4">
            <label for="title" class="block text-lg font-medium text-gray-700 mb-2">Title</label>
            <input type="text" name="title" id="title" value="{{ post.title }}" class="w-full p-3 border border-gray-300 rounded-lg focus:outline-none focus:ring-2 focus:ring-blue-500" required>
        </div>

        <!-- Content -->
        <div class="mb-4">
            <label for="content" class="block text-lg font-medium text-gray-700 mb-2">Content</label>
            <textarea name="content" id="content" rows="4" class="w-full p-3 border border-gray-300 rounded-lg focus:outline-none focus:ring-2 focus:ring-blue-500" required>{{ post.content }}</textarea>
        </div>

        <!-- Author -->
        <div class="mb-4">
            <label for="author" class="block text-lg font-medium text-gray-700 mb-2">Author</label>
            <input type="text" name="author" id="author" value="{{ post.author }}" class="w-full p-3 border border-gray-300 rounded-lg focus:outline-none focus:ring-2 focus:ring-blue-500" required>
        </div>

        <!-- Submit Button -->
        <div class="flex justify-center">
            <button type="submit" class="px-6 py-3 bg-blue-600 text-white rounded-lg shadow-md hover:bg-blue-700 transition duration-300 focus:outline-none focus:ring-4 focus:ring-blue-500">
                Update
            </button>
        </div>
    </form>
</div>
🧠 View Code (views.py)
def update_blog(request, id):
    post = Blog.objects.get(id=id)

    if request.method == "POST":
        title = request.POST.get('title')
        content = request.POST.get('content')
        author = request.POST.get('author')

        post.title = title
        post.content = content
        post.author = author

        try:
            post.save()
            return redirect(reverse('blogs'))
        except:
            return HttpResponse("Error during updating post")

    return render(request, 'update.html', {'post': post})
🤔 Bro, Why Do We Use POST Instead of PUT, PATCH, or UPDATE in Django Forms?
The simple answer is:
By default, HTML forms only support
GETandPOSTmethods.
That’s why, when working with Django’s traditional (non-API) views and templates, we use POST for operations like create or update.
❌ Delete (DELETE) – Remove an Existing Blog Post
You can delete a blog post in two ways:
Directly via URL – Just visit:
http://127.0.0.1:8000/delete/7
(Where7is the ID of the blog you want to delete.)With a Confirmation Page – This is a safer method, especially in real-world apps, to avoid accidental deletions.
🧠 Django View for Deleting a Blog:
def delete_blog(request, id):
    try:
        blog = Blog.objects.get(id=id)
    except Blog.DoesNotExist:
        return HttpResponse(f"No blog with ID {id}")

    if request.method == "POST":
        try:
            blog.delete()
            return redirect(reverse('blogs'))
        except:
            return HttpResponse("Error during deleting blog")

    return render(request, 'delete_confirm.html', {'post': blog})
Here’s an example of a confirmation form template that shows blog details before deletion:
<div class="max-w-xl mx-auto bg-white p-6 rounded-lg shadow-lg">
    <h2 class="text-xl font-bold text-red-600 mb-4">Are you sure you want to delete this blog?</h2>
    <p class="mb-2"><strong>Title:</strong> {{ post.title }}</p>
    <p class="mb-4"><strong>Author:</strong> {{ post.author }}</p>

    <form method="POST">
        {% csrf_token %}
        <button type="submit" class="bg-red-500 text-white px-4 py-2 rounded hover:bg-red-600">Delete</button>
        <a href="{% url 'blogs' %}" class="ml-4 text-blue-600 hover:underline">Cancel</a>
    </form>
</div>
✅ Now that we've successfully built all CRUD operations using Function-Based Views (FBVs), it's time to level up!
we'll explore how to implement the same CRUD functionality using Class-Based Views (CBVs) and Generic Views — Django’s powerful tools that make your code more structured, reusable, and concise.
📖 CRUD with Class-Based Views (CBVs) and Generic Views
In function-based views, we typically check if the request is GET or POST, and based on the request type, we process the appropriate response. By default, the GET method is used for rendering views.
In class-based views, we handle this by defining def get() for GET requests and def post() for POST operations.
🧾 Read (GET)
✅ Using CBV (View Class)
class SeeBlogs(View):
    def get(self, request):
        blogs = Blog.objects.all()
        print("This is class based view")
        context = {'blogs':blogs}
        return render(request, 'blogs.html', context)
📝 Note:
We’re using the same templates for Class-Based Views (CBVs) and Generic Views (GCBVs) that we used in Function-Based Views (FBVs). This keeps the UI consistent while we explore different backend🌐 URL Patterns for CBVs & Generic Views
🏛️ Class-Based Views (CBVs)
# Class-Based View URLs
path('cl/blogs', SeeBlogs.as_view(), name="cbv_seeblogs"),
path('cl/create-blog/', CreateBlog.as_view(), name="cbv_create_blog"),
path('cl/update-blog/<int:id>', UpdateBlog.as_view(), name="cbv_update_blog"),
path('cl/details/<int:id>', DetailsBlog.as_view(), name="cbv_details_blog"),
path('cl/delete/<int:id>', DeleteBlog.as_view(), name="cbv_delete_blog"),
⚙️ Generic Class-Based Views (GCBVs)
# Generic View URLs
path('gv/blogs', SeeblogsGeneric.as_view(), name="gen_seeblogs"),
path('gv/create-blog/', CreateBlogGeneric.as_view(), name="gen_create_blog"),
path('gv/update-blog/<int:pk>', UpdateBlogGeneric.as_view(), name="gen_update_blog"),
path('gv/details/<int:pk>', DetailiBlogGeneric.as_view(), name="gen_detail_blog"),
path('gv/delete/<int:pk>', DeleteBlogGeneric.as_view(), name="gen_delete_blog"),
🧠 Why do we use .as_view() in Class-Based Views?
we are defining methods (get, post, etc.) inside a class, not a function. But Django’s urlpatterns expects a callable view function, not a class.
🤔 So what does .as_view() do?
✅ .as_view() is a built-in method in Django that:
Converts our class (
SeeBlogs) into a callable view function (like FBVs).Internally it maps the incoming HTTP method (GET, POST, etc.) to the respective class method (
get(),post(), etc.).
🧾 Read (GET)
✅ Using Generic View (ListView)
Reading all blog posts with Generic Class-Based Views (GCBVs) in Django is super elegant and requires minimal code. Django provides a pre-built class called ListView that does the heavy lifting for us.
✅ What does ListView do?
Under the hood, ListView:
Automatically fetches all records using
Model.objects.all().Prepares the data for rendering in a template.
Makes your life easier by eliminating the need to manually write a
get()method.
from django.views.generic import ListView
from .models import Blog

class SeeblogsGeneric(ListView):
    model = Blog
    template_name = 'blogs.html'
    context_object_name = 'blogs'

    # no need to define def get(): ..........
🔍 Behind the Scenes
If you open Django’s source code for ListView, you’ll find that it internally uses something like this
context['blogs'] = Blog.objects.all()
📝 Create (POST)
✅ Create (POST) Using Class-Based Views (CBVs)
Creating a new blog using CBVs is a bit more structured compared to FBVs.
In function-based views, the browser by default uses the GET method to render the form — so we usually check the method inside a single function.
But in CBVs, things are cleaner and more modular: we explicitly define separate methods for GET (to render the form) and POST (to handle form submission).
class CreateBlog(View):
    # Renders the blog form
    def get(self, request):
        return render(request, 'create.html')

    def post(self, request):
        title = request.POST.get('title')
        content = request.POST.get('content')
        author = request.POST.get('author')

        try:
            Blog.objects.create(title=title, content=content, author=author)
            return redirect(reverse('blogs'))
        except Exception as e:
            return HttpResponse(f"Error during creating blog: {e}")
✅ Create (POST) Using Generic View – CreateView
Creating a new blog post becomes super simple with Django's generic views — and that’s the power of Generic View ✨
Instead of manually handling get and post like we do in CBVs, Django’s CreateView handles it all under the hood. You just need to tell it what to work with, and it does the rest.
class CreateBlogGeneric(CreateView):
    model = Blog
    # Reusing the same template
    template_name = 'create.html'
    fields = ['title', 'content', 'author']
     # Redirect after successful post
    success_url = reverse_lazy('blogs')
🔄 reverse vs reverse_lazy – Why It Matters in CBV vs Generic View
You might be wondering:
"Bro , Why are we using reverse() in FBVs and CBVs, but reverse_lazy() in Generic Views?"
🧭 Both reverse() and reverse_lazy() are used to redirect the user after a successful operation — like after creating, deleting or updating a blog.
🕒 reverse() – Do it Now
Used in function-based views (FBVs) and regular class-based views (CBVs) inside methods like
post().It immediately resolves the URL when the function runs.
Works perfectly fine here because the view function/class method is already being executed.
💤 reverse_lazy() – Do it Later (Reverse Karo Bad me Jab Jarurat Ho)
Used in generic class-based views (GCBVs) like
CreateView,UpdateView,DeleteViewetc.These views are set up at class definition time, before any method like
post()is called.If you use
reverse()here, Django tries to resolve the URL too early, which can lead to errors or unexpected behavior.So we use
reverse_lazy()— think of it like saying:
🧠 "I’ll reverse this URL later… only when it’s actually needed."
🔄 Update Blog using CBV (Class-Based View)
Just like we did in the create view, here we need to:
Render the update form pre-filled with the blog's existing data.
Handle the form submission using a
POSTrequest to update the blog.
class UpdateBlog(View):
    # render the update form
    def get(self, request, id):
        try:
            post = Blog.objects.get(id=id)
        except Blog.DoesNotExist:
            return HttpResponse(f"No blog post found with id: {id}")

        return render(request, 'update.html', {'post': post})

    def post(self, request, id):
        try:
            post = Blog.objects.get(id=id)
        except Blog.DoesNotExist:
            return HttpResponse(f"No blog post found with id: {id}")

        post.title = request.POST.get('title')
        post.content = request.POST.get('content')
        post.author = request.POST.get('author')

        try:
            post.save()
            return redirect(reverse('blogs'))
        except Exception as e:
            return HttpResponse(f"Error during updating: {e}")
🔄 Update Blog using GBV (Generic View) – UpdateView
Updating a blog post with Generic Views is super convenient. Just like CreateView, you only need to specify a few key attributes:
The
modelyou’re working withThe
template_namefor the update formThe
fieldsyou want to allow editingThe
success_urlto redirect after successful update
class UpdateBlogGeneric(UpdateView):
    model = Blog
    template_name = 'update.html'
    fields = ['title', 'content', 'author']
    context_object_name = "post"
    success_url = reverse_lazy('gen_seeblogs')
🗑️ Delete Blog using CBV (Class-Based View)
Deleting a blog using CBV is straightforward. You just need to:
Get the blog post using its
id.Render a confirmation page using a
GETrequest.If confirmed (
POSTrequest), delete the blog post.
class DeleteBlog(View):
    def get(self, request, id):
        try:
            post = Blog.objects.get(id=id)
        except Blog.DoesNotExist:
            return HttpResponse(f"No blog found with ID {id}")

        return render(request, 'delete_confirm.html', {'post': post})

    def post(self, request, id):
        try:
            post = Blog.objects.get(id=id)
        except Blog.DoesNotExist:
            return HttpResponse(f"No blog found with ID {id}")

        try:
            post.delete()
            return redirect(reverse('cbv_seeblogs'))
        except Exception as e:
            return HttpResponse(f"Error during deleting blog: {e}")
🗑️ Delete Blog using GCBV (Generic Class-Based View) – DeleteView
Deleting a blog using Django’s built-in DeleteView is extremely efficient. Unlike CBVs where we manually write both GET and POST methods, DeleteView handles everything behind the scenes.
class DeleteBlogGeneric(DeleteView):
    model = Blog
    template_name = 'delete_confirm.html'
    context_object_name = 'post'
    success_url = reverse_lazy('gen_seeblogs')
🧠 When to Use Class-Based Views vs Generic Views?
One of the most common questions while learning Django is: "Should I use a Class-Based View (CBV) or a Generic View?"
Here’s a simple way to decide 👇
✅ Use Class-Based Views (CBVs) when:
You need full control over the request/response cycle.
You want to understand Django internals and how views process different HTTP methods like
GET,POST, etc.You’re in learning mode and want to master how Django handles requests.
✅ Use Generic Class-Based Views (GCBVs) when:
You want to write less code and let Django handle the common logic.
Your view logic follows standard CRUD patterns (like listing, creating, updating, deleting).
You want clean, DRY, and maintainable code.
You don’t need to customize too much — just basic forms and views.
🤔 As a Smart Django Developer, Should You Use FBV or CBV?
This is a common question every Django developer faces. There’s no one-size-fits-all answer, but here’s how you can make a smart decision 👇
🔧 When to Use Function-Based Views (FBVs)
FBVs are simple Python functions that take a request and return a response.
✅ Simplicity and Clarity
Perfect for small, straightforward views where you want full control over the logic and flow.
✅ Explicit and Easy to Read
They’re easy to understand at a glance, especially for beginners or new team members.
✅ Quick Prototyping
Ideal for fast development, debugging, and trying out ideas quickly.
✅ Team Preference
If your team prefers explicit logic over abstraction, FBVs may be a better fit.
🧠 When to Use Class-Based Views (CBVs)
CBVs are Python classes that organize views into methods (get(), post(), etc.).
✅ Reusability
CBVs promote reusability and modularity. You can extend base views and override only what you need.
✅ Better Organization
Great for structuring large or complex views, separating logic per HTTP method, and keeping code clean.
✅ Django’s Generic Views
CBVs unlock the power of Django’s generic views like ListView, CreateView, UpdateView, etc., reducing boilerplate and saving development time.
🧾 Final Thoughts
In this blog, we’ve walked through every approach to implementing CRUD in Django — from the traditional Function-Based Views (FBVs), to the structured Class-Based Views (CBVs), and finally the powerful and concise Generic Views.
Each method has its own strengths:
FBVs offer simplicity and complete control.
CBVs bring better organization and reusability.
Generic Views cut down on boilerplate, helping you move fast with less code.
👉 As a smart Django developer, your goal shouldn’t be to just follow one pattern — but to know when to use what depending on the situation.
Whether you're building small features or scalable apps, this CRUD journey gives you the confidence and flexibility to write clean, efficient, and powerful Django code. 🚀


